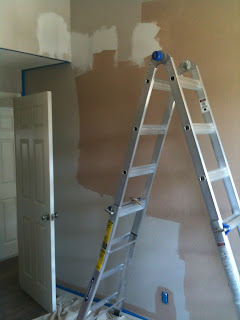
For our first somewhat significant project, I decided to patch the drywall holes our recent electrical work had left. We had a handyman out for an estimate on some other work and when we got the estimate, were a little shocked that it would cost nearly $400 for the drywall repair alone!
My
Black and Decker Home Repair guide listed several methods for smaller holes, but not so much about large square sections being cutout. Another repair guide I ran across online mentioned cutting back the whole section to the studs, but that seemed a little much to me as I had 8 holes to fix!

But while pondering this in the book section at Lowe's (yes, they do have one), a very practical solution using furring strips or metal drywall clips. I found a similar method at
do-it-yourself-help.
Either way, for what seems like a relatively simple repair, I ended up needing a lot of little items:
- joint compound
- drywall screws
- drywall joint tape
- flexible scraper
- furring wood
- knockdown texturing spray (to match the rest of the walls)
- knockdown knife
- drywall sanding sponge
- primer
Plus, we also needed some basic equipment (here's the fun part of building my armamentarium!) including a saw and a ladder, which led to a lot of time on Amazon and other review sites. =)

My ladder search ended up taking a bit of time as I wanted a ladder that could be used as an A-frame for changing our ceiling pot lights and doing interior work, but also tall enough to get on the roof for checking flashings, etc. and getting those palm trees. We had run across the Little Giant ladder in Costco and loved the fact that it was a multi-functional ladder with all the bells and whistles. But it did seem a little steep at Costco's price of
$350 (including lots of attachments). Luckily we ran into our home inspector (who used to be a contractor as well) and asked him about his ladder which he had previously mentioned he loved. He went with the
Werner MT 17 ft ladder which is basically the same as the Little Giant but at less than half the price. Still had the 300lb rating, still could be used as an A-frame or extension ladder and still fit in the back of his car. He had been using it for 5 years now on a daily basis and had no problems. We were sold. Lowe's had it for $179, but Amazon (got to love it) was selling for $119 and with the workstation and standing platform accessories, ended up around $180. These two accessories have been very useful so far. The work platform has a depressions for common sized cans and accessories and the primer and paint cans fit snugly inside. There's also a slot for a flexible scraper/putty knife, several holes for screwdrivers etc, and a lasso from which you can attach a power tool to keep it handy.
But I digress. The patchwork went well, except for a few spots where the hole abutted two studs and one cannot place a piece of furring across. I ended up putting together a makeshift L-joint of two pieces of furring and using that, but the drywall definitely did not sit as nicely as it did with the furring going straight across. I'd love to know how experienced contractors would deal with these holes or if they'd use a completely different method.

 So here are the before pictures of the two walls we decided to repaint. As you can tell, there were quite a few holes from the installment of the new grounded circuit last month. It's tough when you don't have an attic or basement!